

Laravel6.1使用redis队列调用ffmpeg转换视频的方法
2019-10-04 admin laravel 1678
安装FFmpeg在前文已经详细写了,为了方便,只需要yum安装ffmpeg即可。如下代码安装:
sudo rpm --import http://li.nux.ro/download/nux/RPM-GPG-KEY-nux.ro
sudo rpm -Uvh http://li.nux.ro/download/nux/dextop/el7/x86_64/nux-dextop-release-0-5.el7.nux.noarch.rpm
sudo yum install ffmpeg ffmpeg-devel -y
测试安装是否成功
ffmpeg
使用FFmpeg将flv转为mp4
ffmpeg -i beeen.flv -y -vcodec copy -acodec copy beeen.mp4
非常简单,在php使用中,要调用shell_exec,因此,需要在php.ini禁用函数中,删除shell.exec才可以执行。
接下来,用一个极简单的方式,测试laravel使用redis队列是否正常。
在.env文件找到QUEUE_DRIVER=sync改成QUEUE_DRIVER=redis,执行命令生成队列文件
php artisan make:job ShipinQueue
在app/Jobs目录下有了ShipinQueue文件,编辑此文件,在handle方法下入入如下代码:
file_put_contents('wzb.txt','redis队列测试');
echo '恭喜你执行成功';
启动队列监听
php artisan queue:work
随便找一个可以访问的控制器方法,复制下面代码:
\App\Jobs\ShipinQueue::dispatch()->delay(10);
echo 'redis队列演示';die;
用浏览器访问你刚才的控制器方法,过10秒你会发现在控制台输出"恭喜你执行成功",并且项目的根目录会生成wzb.txt文件.

从上面的简单示例中可以看出,队列使用方法是:
// 这个任务将被分发到默认队列...
Job::dispatch();
// 这个任务将被发送到「emails」队列...
Job::dispatch()->onQueue('emails');
现在,我们正式开始今天的话题,使用redis队列转换视频。为了使用 database 队列驱动,你需要一张数据表来存储任务。执行命令生成数据库
php artisan queue:table
php artisan migrate
为了使用 redis 队列驱动,你需要在 config/database.php 配置文件中配置 Redis 的数据库连接。默认已配置好了,不用修改。
转码,为了方便,我们将用户上传的视频,一律转换成可html5播放的mp4格式,代码如下:
fastcgi_finish_request();//后台运行
//$zmjg = shell_exec("ffmpeg -y  -i $oldfile -strict -2 -map 0:v -map 0:a:1 $newfile");//视频自动转码  -map 0:a:1表示第二个音频轨道
$zmjg = shell_exec("ffmpeg -y  -i $oldfile -b:v 2000k -bufsize 2000k -maxrate 2500k -deinterlace -strict -2 $newfile 1> block.txt 2>&1");//控制码率
//$zmjg = shell_exec("ffmpeg -y  -i $oldfile -b:v 2000k -bufsize 2000k -maxrate 2500k -deinterlace -strict -2 -map 0:v -map 0:a:1 $newfile 1> block.txt 2>&1");//第二条音轨
$spjt = shell_exec("ffmpeg -y -ss 00:00:06 -i $oldfile -f image2 -s 720x480 $images");//视频截图
unlink($oldfile);//转码成功就删除原始文件
上面的代码中,需要使用的变量:
$oldfile:用户上传的文件;
$newfile:转换后保存的文件(都是相对路径);
$images:视频截图保存的位置。
为了方便,我们将转码后的视频和截图都保存在public/uploads/shipin/目录下面。将上面的代码修改一下,放在ShipinQueue.php的handle方法中。此外,为了引入以上变量,需要在构造函数中引入:
public function __construct($oldfile, $newfile,$images)
{
$this->oldfile = $oldfile;
$this->newfile = $newfile;
$this->images = $images;
}
在handle方法中,使用$this调用:
    public function handle()
    {
fastcgi_finish_request();//后台运行
//$zmjg = shell_exec("ffmpeg -y  -i $oldfile -strict -2 -map 0:v -map 0:a:1 $newfile");//视频自动转码  -map 0:a:1表示第二个音频轨道
$zmjg = shell_exec("ffmpeg -y  -i $this->oldfile -b:v 2000k -bufsize 2000k -maxrate 2500k -deinterlace -strict -2 $this->newfile 1> block.txt 2>&1");//控制码率
//$zmjg = shell_exec("ffmpeg -y  -i $oldfile -b:v 2000k -bufsize 2000k -maxrate 2500k -deinterlace -strict -2 -map 0:v -map 0:a:1 $newfile 1> block.txt 2>&1");//第二条音轨
$spjt = shell_exec("ffmpeg -y -ss 00:00:06 -i $this->oldfile -f image2 -s 720x480 $this->images");//视频截图
unlink($this->oldfile);//转码成功就删除原始文件
    }
在控制器中,需要传入以上三个变量。
if (file_exists($oldfile)){
\App\Jobs\ShipinQueue::dispatch($oldfile,$newfile,$images)->delay(10);
}上传视频测试看看是否正常。先启动队列监听
php artisan queue:work
结果报错了,在failed_jobs表中记录了错误:
Symfony\Component\Debug\Exception\FatalThrowableError: Call to undefined function App\Jobs\fastcgi_finish_request() in /www/wwwroot/blog.dzbfsj.com/app/Jobs/ShipinQueue.php:34
Stack trace:
#0 [internal function]: App\Jobs\ShipinQueue->handle()
删除后台运行,加上文件存在判断,将其修改为:
    public function handle()
    {
if (file_exists($this->oldfile)){
//$zmjg = shell_exec("ffmpeg -y  -i $oldfile -strict -2 -map 0:v -map 0:a:1 $newfile");//视频自动转码  -map 0:a:1表示第二个音频轨道
$zmjg = shell_exec("ffmpeg -y  -i $this->oldfile -b:v 2000k -bufsize 2000k -maxrate 2500k -deinterlace -strict -2 $this->newfile 1> block.txt 2>&1");//控制码率
//$zmjg = shell_exec("ffmpeg -y  -i $oldfile -b:v 2000k -bufsize 2000k -maxrate 2500k -deinterlace -strict -2 -map 0:v -map 0:a:1 $newfile 1> block.txt 2>&1");//第二条音轨
$spjt = shell_exec("ffmpeg -y -ss 00:00:06 -i $this->oldfile -f image2 -s 720x480 $this->images");//视频截图
//unlink($this->oldfile);//转码成功就删除原始文件
}
    }
后台运行监测正常,但还需要将视频url和截图url更新成新的。
//保存后转码并更新视频链接
$form->saved(function (Form $form) {
$oldurl = $form->url;
$wjm = explode("_", $oldurl);
$filename = end($wjm);//文件名
$hz = explode(".", $oldurl);//文件后缀
$hz = '.'.end($hz);
$whzfile = str_replace($hz,'',$filename);//无后缀文件名
$oldfile = 'storage/'.str_replace('_','/',$oldurl);//上传的文件
$newfile = 'uploads/shipin/'.$whzfile.'.mp4';//转码后视频保存位置
$images = 'uploads/shipin/'.$whzfile.'.jpg';//视频截图位置
if (file_exists($oldfile)){
ShipinQueue::dispatch($oldfile,$newfile,$images);//队列
/**
$default = ini_get('max_execution_time');//取得php最大超时时间
set_time_limit(-1);//设置成永不超时
shell_exec("ffmpeg -y  -i $oldfile -b:v 2000k -bufsize 2000k -maxrate 2500k -deinterlace -strict -2 $newfile 1> block.txt 2>&1");//控制码率
shell_exec("ffmpeg -y -ss 00:00:06 -i $oldfile -f image2 -s 720x480 $images");//视频截图
unlink($oldfile);//转码成功就删除原始文件
set_time_limit($default);//恢复php的最大超时时间
**/
}
$id = $form->model()->id;
$gxurl = ShipinModel::where('id',$id)->first();
$gxurl->url = $newfile;
$gxurl->images = $images;
$gxurl->save();
});
再测试上传,发现路径错误。这是最大的坑!!!浪费一上午时间,后来发现,在控制器中不需要加public,但在队列任务中必须加public路径前缀!!!而且修改本文件后要执行php artisan queue:restart才生效
修改后正常的队列文件如下:
namespace App\Jobs;
use Illuminate\Bus\Queueable;
use Illuminate\Contracts\Queue\ShouldQueue;
use Illuminate\Foundation\Bus\Dispatchable;
use Illuminate\Queue\InteractsWithQueue;
use Illuminate\Queue\SerializesModels;
class ShipinQueue implements ShouldQueue
{
use Dispatchable, InteractsWithQueue, Queueable, SerializesModels;
protected $oldfile;
protected $newfile;
protected $images;
public function __construct($oldfile, $newfile,$images)
{
$this->oldfile = $oldfile;
$this->newfile = $newfile;
$this->images = $images;
}
public function handle()
{
$default = ini_get('max_execution_time');//取得php最大超时时间
//特别要注意路径,需要从public开始,不能省略,和控制器中的引用路径不同,
修改本文件后要执行php artisan queue:restart才生效
$oldfile = 'public/'.$this->oldfile;
$newfile = 'public/'.$this->newfile;
$images = 'public/'.$this->images;
if (file_exists($oldfile)){
set_time_limit(-1);//设置成永不超时
shell_exec("ffmpeg -y -i $oldfile -b:v 2000k -bufsize 2000k -maxrate 2500k -deinterlace
-strict -2 $newfile 1> block.txt 2>&1");
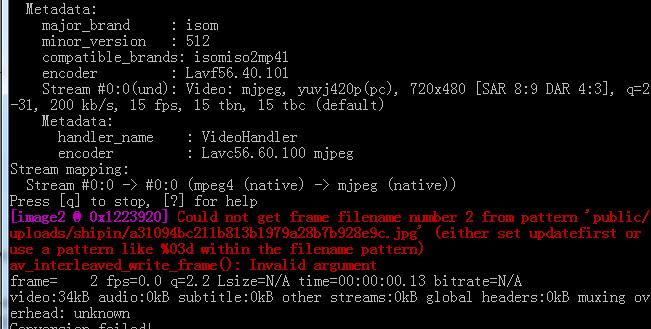
shell_exec("ffmpeg -y -ss 00:00:06 -i $oldfile -f image2 -s 720x480 $images");//视频截图
unlink($oldfile);//转码成功就删除原始文件
set_time_limit($default);//恢复php的最大超时时间
}
}
}监测任务完全正常了(红色的为截图,不影响截图功能)。
接下来,要让队列在后台永久运行,安装 supervisor
# sudo su - #切换为root用户
# yum install epel-release
# yum install -y supervisor
# systemctl enable supervisord # 开机自启动
# systemctl start supervisord # 启动supervisord服务
# systemctl status supervisord # 查看supervisord服务状态
# ps -ef|grep supervisord # 查看是否存在supervisord进程
配置 Supervisor:
先修改 /etc/supervisord.conf 文件内容,将最后一句用;注释,并添加新的一句:
; files = supervisord.d/*.ini
files = /etc/supervisor/conf.d/*.conf
在 /etc/supervisor/ 下创建 conf.d 文件夹(mkdir直接创建),及 shipin.conf (以项目名称命名的),添加内容如下(注意路径要directory=/www/wwwroot/blog.dzbfsj.com/和你的系统相同,我的是宝塔面板,这是关键):
[program:laravel-worker]
process_name=%(program_name)s_%(process_num)02d
command=php artisan queue:work
directory=/www/wwwroot/blog.dzbfsj.com/
autostart=true
autorestart=true
user=root
numprocs=1
redirect_stderr=true
stdout_logfile=/www/wwwlogs/worker.log
执行命令使配置文件生效
supervisorctl reread
supervisorctl update
重启 supervisord 或者修改了 /etc/supervisord.conf 执行
supervisorctl reload
接下来,开始正式运行:
supervisorctl start laravel-worker:*
查看运行状态
supervisorctl status
//提示RUNNING代表成功
查看进程 (ps -ef | grep ProjectName)
ps -ef|grep laravel
常用命令
service supervisord start   #启动
service supervisord stop    #停止
service supervisord status  #状态
supervisorctl reread
supervisorctl update
supervisorctl reload
supervisorctl status
supervisorctl shutdown  #关闭所有任务
supervisorctl stop|start program_name #启动或停止服务
supervisorctl status #查看所有任务状态
如果修改了laravel的队列文件,需要执行以来命令更新:
php artisan queue:restart
php artisan queue:work
如果不想安装这个,可以直接在终端运行这个,再关闭终端:
php artisan queue:work --daemon
或者:
nohup /www/server/php/73/bin/php /www/wwwroot/blog.dzbfsj.com/artisan queue:work 2>&1 > /dev/null &
如果是宝塔面板的话,已集成了该工具,直接在面板安装插件即可(不支持php7.3):
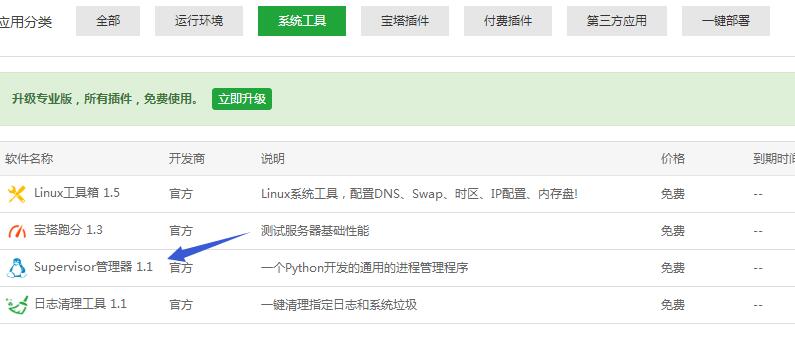
全部安装完毕。
注意,默认队列60秒超时,进行会被Killed,需要执行:
php artisan queue:work --timeout=0